2020-03-17

The March of Progress

In ancient times, I was assigned to a legacy project that was nearly 30 years old. Much of the team on that project had been on it for just as long. These are not inherently bad things. There is great value to a team with rich experience and intimate project and domain knowledge. Risk can arise, though, from technology, tooling, and processes that are allowed to stagnate unnecessarily, despite easy access to free education and resources. If you are reading this, chances are that you know what it's like to be in tech; the world is constantly moving, and if the momentum leaves your project behind, it only gets harder to catch back up, no matter how important catching up might be.

When I joined the aforementioned project, the team had not yet (in their twenty-some-odd years) implemented any kind of source control. Keeping a project alive without source control for that long without catastrophe struck me as miraculous, and dangerous. A degree of waste was also in play, considering the process overhead in manually managing a large code base among a growing team of developers. The merge process for the flagship product at the time I left the company was still (I wish I were kidding) to copy the entire code base onto a network drive with my changes in it; the team lead would then pick that up and copy my changes among his own for each release, by hand.

Despite being low on the totem pole at the time, I voiced my concerns early, and gently. Management responded with confidence (and I hazard to say, defensiveness) that their project was not suited to source control. Besides, they said, the transition to any source control system would be too risky, and cost too much time. Determined to demonstrate otherwise, on my own time I carried out a proof of concept to show both that the project was suited, and that the transition itself was feasible. Leadership was not impressed, and declined to move on source control.

Management's hand was finally forced, though, by the continued growth of the project's complexity and team size. With myself added to the team, it had nearly doubled in size, in just half a year. The existing process of copying gigabytes of monolithic project code and assets back and forth for every significant change (let alone the manual process of merging that code) was no longer sustainable. The project lead, however, continued to resist the transition to source control. He raised concerns over poor reliability, and worried that source control would be too slow and restrictive in its capabilities. When pressed, he admitted not researched the topic, including not having read my emails to him on the topic or looking at my proof of concept even in passing. Incidentally, though it is not the topic of this essay, that was the moment I decided I was going to start looking for a new job.

By way of disclaimer, I am not myself a team lead (though I aspire to become one some day). However, having worked under several, I have observed and learned from some of the habits of leaders who I, personally, believe to be successful. Now, it's good to have an understanding of what I mean here by "success." The management team described above considers themselves to be successful, because their company has not failed and there have been no catastrophic failures of the software in the wild - yet. From my perspective, though, I see a great deal of churn on inefficient processes, which wastes time and energy that could be spent on new features or products; I see tremendous risk involved in the event major defects are discovered, rollbacks need to be made, etc; and I see stressful pain points for the developers and even the team lead himself in working within the confines of the existing system.

I would like to give this team the benefit of the doubt and say that it is fear that held them back, rather than laziness (and I do believe this to be the case). They did not understand what source control was, and so they were scared of it. The way they saw it, things just worked, and worked just fine. However, a small amount of research, an openness to change, and a relatively small amount of effort would have made their lives far and away better than under the existing system. I suppose the moral of the story, if there can be said to be one, is that some comfort with learning about the unknown can allow you to convert unknowns into knowns. And when you do that, you broaden your horizons, strengthen your skills as a team and an organization, and give yourself more tools with which to be successful. I, myself, have a natural tendency to hesitate and shy away from the discomfort of the unknown; but only by pressing on into the unknown can I uncover what is there, and build myself up for the next task ahead.

2020-03-10

Inverted Mouse Scrolling in Windows w/o RegEdit

I love inverted mouse scrolling. Meaning, when I spin my scroll wheel away from myself (up), I want the UI to scroll down. When I spin the wheel toward myself (down), I want the UI to scroll up. This feels intuitive to me because it's how touch screens (phones, tablets, etc), and touch pads (Mac and PC laptops, notebooks, etc) all work. When you slide your finger upward along the screen or touch pad, the thing you're touching follows your finger upward. I never understood why scroll wheels behaved in reverse. To me, the default Windows scroll wheel behavior is the "inverted" one.

Unfortunately, Windows provides no native method of flipping this simple input. If you know what you're doing, and you have enough system access, you can modify the Windows system registry using regedit.exe. This strikes me as a pretty invasive way to go about flipping something as simple as mouse wheel scrolling. But for some reason, this is the primary method I keep finding in searches. It turns out there is an easier way that doesn't require the same level of administrator privileges (though it does come with a potential downside).

PS C:\> Get-ItemProperty HKLM:\SYSTEM\CurrentControlSet\Enum\HID\*\*\Device` Parameters FlipFlopWheel -EA 0 | ForEach-Object { Set-ItemProperty $_.PSPath FlipFlopWheel 1 }

Shamelessly but usefully ripped from this post on StackOverflow.

The downside to this method, as you can see, is that the FlipFlopWheel property is being set to 1 for every single object in our query. This may not be ideal for your situation. For me, I just needed a way to get my mouse wheel flipped, and to have it persist, without needing to go into the registry. I'm surprised that this issue has persisted so long, over so many iterations of Windows itself, that this StackOverflow question from over 8 years ago is still relevant, but here's the solution!

Separation of Concerns

Rules are handed down from authority figures. Best practices, though, are born of community consensus on good ways to get things done. There are usually good reasons for certain practices to surface out of our collective consciousness. One simple, sometimes painful example is white space in code. The example is painful because there are so many ways white space can be used (or abused). The broader community prefers a handful of styles; these make code easier to read and digest for other developers (and even our future selves). Proper use of white space, thus, has become a best practice. Tools now exist to enforce proper spacing; languages like Python even go so far as to define scope using white space.

Okay, let's get into it. I have a piece of gold-stamped parchment declaring me "Master" of computer science. I'm not so sure about that. In any case, there are certain best practices that even I can recognize as sensible, useful, and even important. When these practices are ignored (or willfully disregarded) it gives me the fingernails-on-a-blackboard shivers.

One such best practice is known as separation of concerns. There are many levels, high and low, at which it can (and should) be observed. The basic idea, however, is that you want a given piece of code or architecture to:

  • do its job
  • do its entire job
  • do no one else's job

Once you've called a function, you should be able to expect its job to be completed. Sure, the function might delegate responsibility to smaller helper functions, breaking the task into workable chunks; but when that function eventually returns, the job should be done. Importantly, nothing else should have been done along the way. When extra stuff gets done along the way - either intentionally or by accident - we call that a side effect. According to the tenets of functional programming and general coding best practices, side effects are bad.

My mission today is to use a frustrating, real-life example to illustrate the importance of this concept, leaving as much of my emotional baggage at the door as possible.

A company I used to work for had a design review process in place. All tasks required project lead approval before development could begin on a task. It meant some extra overhead, but I liked the sentiment. I think it's a fine idea to have strategies vetted by leadership and scoured for weaknesses before mistakes are made. Cool.

So my task was to add a reporting feature to our existing product. The existing feature retrieved documents from the back end, looping over them and calling a helper function to print each individual one. There were weaknesses in this design to begin with - you may wonder, as I did, why each individual document had to be retrieved with a separate query - but it wasn't my design and I just had to work with it.

Let's pause in brief review. Someone wants to print a batch of reports. They call the batch printing function, whose one job is to print a batch of things. We expect our function to:

  • do its job (print the batch)
  • do its entire job (read each document file and print it correctly, i.e. perform sub-tasks that the main task depends on)
  • do no one else's job (don't randomly delete user accounts, etc)

Still with me? Okay. Now we get to my task and the problem I encountered.

At the batch printing level, I was to gather data on each individual report in the batch. This was to be aggregated and added to the final batch report. I came up with a few angles of attack. With separation of concerns and best practices in mind, I avoided solutions that leaned on side effects. What do I mean, here? I mean that I wanted to be clear with what each part of the code was doing; and I wanted the code to do nothing more than it was asked.

For example, my new function would return data to be aggregated, rather than modifying aggregation data by reference. This meant I had to add another function to manage the aggregation itself. A little extra work? Maybe. But the result was crystal clear code, functions with crystal clear purpose and methodology:

Function A, aggregator

  • do its job (aggregate data from multiple calls of getter)
  • do its entire job (return aggregated data)
  • do no one else's job (don't email users' credit card numbers to other users)

Function B, getter

  • do its job (gather data about a document)
  • do its entire job (query back end and return the result)
  • do no one else's job (don't drunk dial Function X)

Without getting into details, I can tell you that even this solution felt a little messy to me. Within the project and resource constraints, however, and in light of what followed next, this was a positively glowing example of separation of concerns.

The project lead rejected my design proposal wholesale. I was instructed to write a system of helper functions into the ORM class for the documents.

Confused?

me too

He specified hard-coded mock-ups of data from unrelated classes to be written into the ORM. This would, he argued, allow us to perform testing and comparisons of data and models from within the ORM class. In other words, outside code that called the ORM class constructor would have no idea that a partial testing framework and a whole suite of hard-coded data was being instantiated, parsed, judged, and passed around, complete with database interactions, that had nothing to do with the the ORM itself.

Imagine troubleshooting the reason for data coming in from the wrong table. Imagine database calls being made when you aren't making them. Imagine your report's performance profile degrading, only to find out that someone had hard-coded your document's ORM class with sample data and testing infrastructure ... for some random batch document report printing functionality. Can you imagine that?

I can; I lived it. This was an extreme example, but let the allegory of the hard-coded ORM stand as your reminder to keep best practices and separation of concerns close to your heart.

2016-10-11

Switching to React - First Impressions

In earlier posts I wrote that I planned to use Handlebars as my templating engine for the CYOAG project. Things happened since then that caused me to change directions towards ReactJS. I'll take a moment here to say that I've had no contact with or sponsorship from the Handlebars or React teams. This is all just my opinion, formulated based on personal experience working with these technologies on the side-project level. Incidentally, though I'm enjoying working with React, this is notwithstanding my opinion of Facebook, who we have to thank for React. So there's some food for thought.

So why did I make the switch?

I realized Handlebars was more challenging to learn than a templating system needs to be. I didn't find community support to be as extensive or helpful as I'd like. Handlebars also hasn't enjoyed industry adoption as extensively as React, so from a career growth aspect React seemed a better choice. Ironically, the reason I chose Handlebars originally was because we used it on a project at work. But after talking to the lead dev on that project, I learned it wasn't selected for its quality or utility, but due to circumstance. Finally, having built my first working Handlebars prototype, it just didn't feel right. There's no remedy for that.

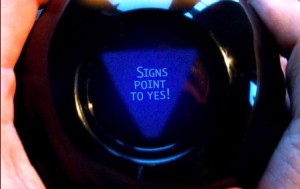
So, React. It's already big in the web dev scene, has been for some time, and continues to grow. Whether it'll become a longstanding mainstay in industry remains to be seen, but signs point to yes.

I'm surprised to say it, but React was easier to pick up than Handlebars. It surprises me because React has lots of new ideas and syntax you have to learn, while Handlebars has relatively few and advertises itself as a "no frustration" templating system; which, I can attest, is patently false. React, likewise, advertises itself as "painless," also a lie. I'm being a little harsh here, but point being that I find React less painful than Handlebars, despite the fact that neither is a walk in the park.

To be fair, Handlebars lends itself better to smaller projects. The infrastructure and planning required to use it is lighter. To get Hello World up in React, you have to do more work, download more libraries, and learn more technology: JSX, props, state, rendering, components and their lifecycles, etc. In Handlebars, you slap up a template and you're off to the races (relatively-ish). Build processes are another story. I found precompilation to be roughly equivalent in difficulty from Handlebars to React. The documentation is better for React, though, due to superior community support. More community support means more flavors of help, and a greater likelihood one of them will match your style of learning.

The appeal of React is reusability, structure, and organization. From a mile-high perspective, let's say you're the app lead for Facebook, and you want a UI component to let people "Like" things. All kinds of things; wall posts, images, events, shared links, comments, everything. With React and some proper planning, you can make a single component displaying a "Like" link, that dynamically hooks up to whatever needs to be "Like"d. The component itself doesn't care what it belongs to. You can plug-and-play it wherever. One downside to this, as mentioned above, is that the initial development of this component is relatively heavy. Once you have it built, though, you can reuse it dozens, hundreds, millions of times, at very little dev cost.

Another downside is that you have to be conscious of your component structure when building larger applications. CYOAG is not a large application, but if I didn't think about component structure in advance - and thus plan out how state was to managed and communicated among components - I'd find myself having a real bad time. The complexity of component interactions isn't hard to wrap your head around, but once you've built them, that complexity makes maintenance and modification a chore, and a considerable risk.

Part of this is because state and props "cascade" (my term) from parent components to child components when you build an application The React Way. So if anything changes along the cascade path, you have to make sure you account for it at every step and in every handler. Of course, things change as we go, this is life; but I think we can all agree it's to our advantage to minimize this, and with React, best practices in design amplify this risk/advantage relationship.

In short, React encourages better software engineering principles. Other technologies allow you to start hacking out a solution before thinking it through, which can lead to other kinds of headaches down the road.

Non-technical Example

We can use my (thus far incomplete) React component design doc for CYOAG as an example for this. I won't bother quoting the doc here, you can read it if you like. In short, the application state is best managed at the top level. One easy reason to explain for this is that if you allow children to manage state, you'll quickly find yourself making more calls in integration, and having a hard time communicating among components. So we manage the state at the top level, and (in short) provide getters and setters for particular parts of the state to children through props.

When building your components, it's helpful to know what state you'll need to be passing down to children from the ancestral point of view; and what props to expect to receive from the descendent's point of view; and what functions will be needed in order to manage and pass these around. And later, if changes need to be made, you need to keep this "flow" of state in mind to preserve it.

These are my early days with React and my opinions and understanding will undoubtedly develop as I develop applications using React. Once I start using this code "in production" on CYOAG, I'll have plenty more to say, I'm sure.

Thanks for reading!
- Steven Kitzes

2016-10-03

Circular Dependency in Relational Databases

This post is going to have an element of storytelling to it, because while some elementary understanding of SQL will be required, the Cliff's Notes seem to tell it all:

You probably want to avoid circular dependencies in relational databases.

These Cliff's Notes are incomplete, a little vague, a bit of an oversimplification, and up for debate besides. Some RDBMs (relational database managers) handle circular dependency better than others, and some problem domains necessitate circular dependency. Take, for example, table representations of nodes in a graph that allows cyclical paths.

However, not all problems necessitate circular dependency, and some RDBMs prohibit, or aren't capable of handling, circular dependencies. In these cases, we need to design around the limitations of our RDBM, and in any case, it's good to be aware of circular dependencies, just on principle. The purpose of this post is thus to share my own early explorations of database design, and to describe how I broke out of the circular dependency trap on a small side project.

Some project context will help here. I've been working on a passion project for a little while now. The high level idea is to build a "Create Your Own Adventure" game, where all content is user-generated, and the best story line branches rise to the top through a voting system like that used by Reddit and StackOverflow. An important early part of this project involved designing a decent database schema to build the rest of the project on top of.

You may wonder why I chose an RDB (relational database) for this in the first place, rather than an alternative such as some flavor of NoSQL. I plan to host this on the AWS (Amazon Web Services) free tier, so I can learn more about AWS. Unfortunately, at the time I started this project, the AWS free tier didn't offer any option other than RBDs. Incidentally, an RDB is almost certainly best for this type of application due to the interrelationships of different types of data, but that's a topic for another time.

So, how did a circular dependency surface in my design?

One feature I want this app to have is position persistence. When a visitor is reading the story, I want to remember where they left off, so they can conveniently come back and resume reading the story at a later date. My plan was to give the Users table a column called Current, to track a given user's position in the story. In other words, a story node would appear as a foreign key in the Users table.

The Nodes table was designed with an Author column to record who had authored a given story node. This was to support a variety of features, such as prohibiting authors from voting on their own posts, and allowing an author to edit their contributions, while protecting those posts from being edited by others. Unfortunately, you'll notice this means a user (author) is now a foreign key in the Nodes table.

Uh oh.

Now I have a node ID as a foreign key in the Users table, and a user ID as a foreign key in the Nodes table. This is a circular dependency of sorts, and is a block in SQL. You'll find some argument as to whether circular dependencies are fundamentally bad practice, or whether SQL just suffers some unhappy limitations. After all, what's conceptually wrong with tracking current node in the Users table, and author in the Nodes table? There's no conflict in authority over the data, since a user doesn't own its current node in this read-only context, it's just a position marker. To be fair, SQL doesn't understand our motivations, and to argue that an RDBM's designers could have done more toward enabling us to convey these human intuitions to the machine is too philosophical for this post.

Whatever the reason and our opinion of it, MySQL forbids this kind of interdependency. The solution I came to was to create a simple table called Positions, with a compound primary key consisting of two foreign keys, one being a user ID from the Users table, the other being a node ID from the Nodes table. Despite some apparent duplication of information, this works for the simple reason that the Positions table relies on Users and Nodes, but neither Users nor Nodes relies on Positions. I'll try to illustrate the improvement in design without opening Visio:

An arrow (->) implies dependency

Before:

Users -> Nodes
Nodes -> Users

As you can see, this yields Users -> Nodes -> Users, and so on, ad infinitum. This is bad.

After:

Nodes -> Users
Positions -> Users
Positions -> Nodes

We can combine two of these lines together to yield:

Positions -> Nodes -> Users
Positions -> Users

but you can see that this doesn't introduce any loops, or circular dependencies, as my first design did.

Thanks for reading!
- Steven Kitzes

2016-08-29

Alexa Skill Hackathon Takeaways

This past weekend we had a hackathon at work, focused on developing Skills for the (relatively) new Amazon Echo. The purpose of the hackathon was to expose us to a technology we hadn't used before and explore what use cases might exist that we could leverage either internally, or for customers. We had a great time and built some really fun Skills along the way to learning the Alexa Skill development tools. We found there were pros and cons, as with anything, and I personally took away a few key lessons from my short time working with the Echo.

I want to take a moment here to point out that I wasn't paid or encouraged by anyone, anyone at all, to share my experience on this blog. Amazon, to my knowledge, had no part in this hackathon; it was an internal event we did just for fun and exploration. I just want to solidify what I learned by revisiting it in a writeup. So let's talk about the Echo!

When you buy the Amazon Echo, you are buying a very nice piece of hardware that connects you to a service named Alexa, which is where the magic happens. You make your voice request, and then Alexa uses Skills (voice applications) to do something useful or fun in response to your request. First of all, I want to say that Alexa is a lot of fun to work with from a creative product standpoint. Working with Alexa's voice API provides a vast landscape of opportunities to be creative in ways that feel fresh and new. Alexa is also a lot of fun to use from the consumer standpoint, for me at least. I've heard many people say they don't know what they would do with an Echo if they had one, but to someone with that complaint, I'd say the cliche that there's an app for that holds true here.

Alexa has tons of capabilities out of the box, covering everything from checking the weather, to listening to podcasts, news, and music, to telling jokes, to making purchases on Amazon through your account. The system can integrate with home automation tools, and work in concert with apps on your phone to manage shopping lists, to-do lists, and other handy utility features. Additional Skills can be obtained from the community through the Skill Store to cover all kinds of additional fun and useful scenarios. Alexa has lots to offer.

In case this is reading too much like an advertisement, don't worry. There's plenty for Amazon to work out with the Echo before I would ever buy one at full price. That being the first of my concerns: I find it to be unjustifiably expensive. You're buying a speaker, with a hardcore microphone array, connected to the web via wi-fi; that's really all the hardware you get, and it comes in just shy of $200. It is a very nice enclosure, and the speaker itself is exemplary; but without internet, this thing is a brick. The Echo does no work of its own locally. All services are performed by Alexa on Amazon's side, and piped back to you over the web. I can go to OK Google, or Siri, or even Cortana for a lot of what Alexa can provide; so $180 feels brutal for the sole perk of having your voice assistant always-on. A big downside of the Echo, compared with voice services provided by Google, Apple, and even Microsoft, is that the Echo is immobile, whereas your phone is always with you. Adding to the cost, some of the handy features (music providers being a prominent one) require subscription fees; and the buy-by-voice feature, while convenient, can feel a little dangerous since Alexa doesn't recognize which voice is yours. (Buying each other socks without permission became a running gag throughout the hackathon.)

Along those lines, Alexa doesn't always understand voice input clearly, so you sometimes find yourself repeating commands to get her to hear you right. I find Google's voice recognition to be a tad more reliable. Alexa also does poorly if you try to give her a command in a room with other people speaking. She can't differentiate among voices, and this is very frustrating at times. Granted, this is an emerging technology, and natural language and voice recognition are very challenging problems for computers to handle, but from a practical, daily usage standpoint, this is often a frustrating shortcoming.

By far, though, my biggest gripe about working with Alexa is as a developer. Every technology has its idiosyncrasies, but I found learning the Alexa Skill developer tools to be a particularly harrowing experience. First of all, you need to use Amazon Lambda to host your Skills. Amazon Lambda is a cool idea, but developing Alexa Skills thereon is a new kind of challenge, and not in any particularly fulfilling kind of way. The tools for building Skills are a little clunky and the documentation is practically non-existent. They have some nice features, like the ability to test your Skills without needing to go through the time-consuming process of conversing with Alexa repeatedly. However, in order to deploy Alexa skills, you need to access two separate dashboards; the Skill itself, the Lambda logic, is deployed on AWS Lambda through the AWS console, but you have to separately log into the Amazon Developer Console to access Alexa configurations and tools to define things like user interactions, and recognized user phrases. Where is this documented? Great question.

The feedback from the system when something goes wrong is minimal. You'll get messages like "Syntax error." That's it. What kind of syntax error? Where? Your only option is to lint the code yourself and hope that any of your mistakes can be found that way, or be so good at programming that you never make typos or logic errors. There's not much available in terms of debugging help. By its nature, Amazon Lambda also faces the limitation of weak session and state management. This is one reason why some of us at the hackathon resorted to using Alexa as a forwarding service, simply to translate voice into API calls to a remote server (EC2 in this case) that hosted more complex service implementations outside of Amazon Lambda.

As mentioned earlier, the documentation for this set of developer tools is sorely lacking. The official Amazon guide points to a blog post from 4 months ago that is not only incomplete, but also already out of date, with screenshots and instructions that are both flat-out incorrect. It was a headache trial-and-erroring our way through the process of developing our first Alexa Skill and finding third-party tutorials for Skill development. We were able to pull it off, but it was a lot harder than it needed to be. It could have been an hour long process if the documentation had been half-way complete or at least up-to-date. I would expect sketchy documentation from open source projects made by volunteers; not from a top tech company, on a service they profit from, that other developers are meant to use as part of a business model. Maybe I expect too much, but fair or not, that is my expectation of a for-profit system provided by a sixty-five billion dollar tech company.

It really doesn't feel like Amazon is bringing their A-game to the Alexa developer community. If these issues cropped up during an open beta or in a staging environment, that would be one thing, but this is a public-facing, monetized platform. One or two of the features are sub-labeled as beta as of this writing, but the features work fine; the process and interface design are just abysmal, and the documentation is being provided by home-use amateurs because Amazon isn't providing it. I personally find that to be a weak effort on Amazon's part.

Overall, I do like the Echo and Alexa, and I would like to have one if the price were more reasonable. I find it fun and useful. I would also be excited at the opportunity to do more development on Alexa Skills now that I know the process, but it was needlessly painful to learn the ropes compared with other platforms.

Thanks for reading!
- Steven Kitzes

2016-08-07

Precompiled Handlebars - A Ridiculously Clear Tutorial

This is a step-by-step tutorial on getting introductory, hello-world level, precompiled Handlebars up and running.

Just so you know, if you're already fluent in NPM or otherwise want to skip ahead, you can jump to the good stuff

It's my first time writing a tutorial like this. I plan to take you through it very slowly, but very clearly, so that even beginners can understand if they have some programming experience, but little to no web or templating experience. If this style of tutorial proves helpful to people, I'll follow up with a second tutorial on more in-depth Handlebars features. I encourage you to send any feedback that will improve this tutorial. Now let's dive in!

For those who read my recent post about a "real" side project, I know I promised a more detailed explanation so I'll tack it on at the end here. ;)

First, some context. What you're reading was born partly of frustration. I had a needlessly difficult time figuring this out for myself, and I want it to be easier for others in the future. Therefore, today's post has become three things: a precompiled Handlebars primer, a learning experience post-mortem, and an experiment in writing effective tutorials for beginners, by recent beginners. Handlebars isn't hard to learn, the concepts are approachable; but existing tutorials, StackOverflow Q&As, even the Handlebars team's own documentation assume you already know web dev and templating, so their tutorials give condensed steps for experts to hit the ground running.

Not much help for a beginner like myself. Therefore...

Handlebars for Beginners, by a Beginner

I'm going to take you through the steps I had to take to get this project moving, from the perspective of someone with beginner-level knowledge of web development, and zero knowledge of templating. I won't leave any of the steps out or assume you know any of them, and I'll try to cover the minutiae and details that many tutorials gloss over, either because they figure you already know them, or because it doesn't even occur to them that you might not know them. I also don't like tutorials that speak only to Windows users when I'm stuck on Unix for work, or vice versa, so I'll try to cover these cross-pollinations as well.

The only thing I won't explain in detail is installing NPM, the Node Package Manager. You'll need to have that running in order to precompile. It is relatively easy to get NPM going, here are installers/binaries for Windows, Mac, and even Linux.

Just so you know, the installer is intended to automatically add NPM to your PATH variable, but in some cases an error may prevent that. I'm tempted to describe the fix for this, but due to the number of operating systems out there, it's beyond the scope of this tutorial. Just be aware of this if you install NPM and it doesn't work, and it's not immediately obvious why.

Brass Tacks

First, you must install Handlebars for Node.js via NPM. From the command line (any directory is fine), issue the following command. Note for Windows users: think of the '$' symbol as your 'C:\>' or other command line prompt.

$ npm install -g handlebars

Now you should be able to run Handlebars on the command line from any directory. To test, try typing the following, and you should be rewarded with your installed Handlebars version, in my case, 4.0.5:

$ handlebars -v

4.0.5

That is all the infrastructure you need. Now I'll take you through the process of building a few files that you'll need. This is one place in particular I find that other tutorials fail to be clear, so I will do my best. First of all, I'll assume for clarity everything is taking place in the same directory, so make yourself a directory and keep all files there. I encourage you to improve your infrastructure and employ best practices, but later. First let's make sure we understand this technology.

We will end up with a total of 4 files:

  1. We will make a Handlebars temmplate file, with the .handlebars file extension (not strictly required, but consider it so for the purposes of this tutorial)
  2. We will make an HTML file to inject our template into
  3. We will download or link to the Handlebars library provided by the Handlebars team
  4. The Handlebars precompiler will output a JavaScript file which performs our template injection (details to follow, don't get intimidated yet if this sounds foreign or complex)

Some folks will likely argue the best practice is to link in your code to an outside source for your Handlebars library (file 3). That may be so, but to make your life easier, I recommend downloading it and keeping a copy locally for the purposes of this tutorial. You can get it here. The version I got is called handlebars-v4.0.5.js.

File 4 is output by the precompiler, so we won't worry about that yet. Let's start by making a very, very simple template (file 1), to inject into our HTML file (file 2). What you need to know for now, is that a Handlebars template is basically made up of a mixture of raw HTML, and special Handlebars tags (discussed later). What that means, is that we can get started with an extremely simple example template containing just HTML, to make sure we have a grasp on the concepts, and that we're doing it right. So here's file 1, in all its young glory:

hello.handlebars File 1
  1. <p>Hello, world!<p>

Yup, that's it for file 1. Precompiling is very simple and straightforward, assuming Handlebars is installed properly. What you need to know for now, is that Handlebars takes .handlebars files and turns them into .js files. So let's use Handlebars to turn hello.handlebars (file 1) into hello.js (file 4):

$ handlebars hello.handlebars -f hello.js

... or more generically ...

$ handlebars <input-file>.handlebars -f <output-file>.js

Note that the Handlebars precompiler doesn't give you any real feedback on the command line. Just check that you got a .js file out of the deal, and that it contains some JavaScript in there, including your HTML. At this point, if all has gone well, we should have the following files, all in the same directory:

  • File 1: hello.handlebars Handlebars template file
  • File 2: not done yet
  • File 3: handlebars-v4.0.5.js or version of your choice
  • File 4: hello.js output from file 1

So all we need to do now is put together a very simple HTML file into which our template will be injected. Note that in this case, I'll be including some JavaScript in my HTML file. Normally, it may be wise to separate your JS from your HTML files, but for simplicity I'll keep it all together for this tutorial. Let's start with a very basic HTML file and build our way up from there. I'll highlight changes at each following step in green, and describe the changes.

hello.html File 2
  1. <html>
  2.   <head>
  3.     <meta charset='UTF-8'>
  4.     <title>Handlebars Tutorial</title>
  5.   </head>
  6.   <body>
  7.     <div id='content'></div>
  8.   </body>
  9. </html>

If you're new to HTML, most of this should still be approachable. Just note the <meta> tag, which tells the browser what character encoding the HTML file uses; and the initially empty <div> tag, which warrants more explanation (but for now, don't overthink it; it's a generic container for part of a page's content).

Nothing really special going on here, if you load this in a browser now, it'll just be a blank page. Just take note that <div id='content'><> is the place in this HTML that I have chosen to inject my Handlebars template, which is why I gave it an ID.

Now I'm going to add in some vanilla JavaScript, whose job is singular: tell the browser not to try doing anything with any scripts, until all of them are loaded. (If you want to do this using jQuery or other more advanced methods, I encourage it, but the point of this exercise is to be simple and to-the-point, so for now, we'll stay vanilla.)

hello.html File 2
  1. <html>
  2.   <head>
  3.     <meta charset='UTF-8'>
  4.     <title>Handlebars Tutorial</title>
  5.   </head>
  6.   <body>
  7.     <div id='content'></div>
  8.     <script type='text/javascript'>
  9.       function init() {
  10.         // This only runs after the whole page is loaded
  11.       }
  12.       window.addEventListener('load', init, false);
  13.     </script>
  14.   </body>
  15. </html>

Simple enough to follow, I think. Now, let's add in the scripts themselves, that the browser will load before running our init() function.

hello.html File 2
  1. <html>
  2.   <head>
  3.     <meta charset='UTF-8'>
  4.     <title>Handlebars Tutorial</title>
  5.   </head>
  6.   <body>
  7.     <div id='content'></div>
  8.     <script type='text/javascript' src='handlebars-v4.0.5.js'>
  9.     </script>
  10.     <script type='text/javascript' src='hello.js'>
  11.     </script>
  12.     <script type='text/javascript'>
  13.       function init() {
  14.       }
  15.       window.addEventListener('load', init, false);
  16.     </script>
  17.   </body>
  18. </html>

Magic Happens

We're going to inject our template with just 3 lines of code. You can do it in fewer, but for clarity I'm spreading this over more lines. I'll explain this process line by line following the new code below:

hello.html File 2
  1. <html>
  2.   <head>
  3.     <meta charset='UTF-8'>
  4.     <title>Handlebars Tutorial</title>
  5.   </head>
  6.   <body>
  7.     <div id='content'></div>
  8.     <script type='text/javascript' src='handlebars-v4.0.5.js'>
  9.     </script>
  10.     <script type='text/javascript' src='hello.js'>
  11.     </script>
  12.     <script type='text/javascript'>
  13.       function init() {
  14.         var target = document.getElementById('content');
  15.         var inject = Handlebars.templates['hello'];
  16.         target.innerHTML = inject();
  17.       }
  18.       window.addEventListener('load', init, false);
  19.     </script>
  20.   </body>
  21. </html>

Line 15: This is the easy part. We are just creating a JS variable to represent the $lt;div> we're going to inject our template into.

Line 16 Here we are grabbing our template, and putting it in a variable called inject. There are a few things here worth knowing. First of all, the reason we have access to the template at all, is because we included the hello.js file we precompiled with Handlebars on the command line (file 4). We have access to the Handlebars variable because it is provided by handlebars-v4.0.5.js, file 3, which we also included. As a convenience, Handlebars allows us to refer to our precompiled script by file name, without needing the extension (e.g. 'hello' instead of 'hello.js'). The last thing that is critical to understand, is that inject is now a function, not a string or other variable type. You must therefore use it as a function, and that function returns the precompiled template as a string.

Line 17: Now that we have our target, and our injection function, we can inject our template into the target. We call our template function, and assign it to the innerHTML property of the target. Done! If all has gone well, you should be able to load your HTML and see your simple HTML template loaded into an otherwise blank page: "Hello, world!"

Celebrate

This write-up has given me a great opportunity to review what I learned in teaching myself Handlebars, and I hope this tutorial, written from the perspective of a web templating beginner, for other beginners, was helpful.

Thanks for reading!
- Steven Kitzes


CYOAG

I promised to describe my side project, so I'll take just a moment to do that. (It'll be a quick moment, because that's all I have to spare at this particular moment, but I want to fulfill my promise of sharing my idea.)

In short, it's a user-generated Choose Your Own Adventure game. Many of us enjoyed these books as kids. The basic idea for those of you who are unfamiliar, is that you read a chapter, the book lets you make a decision for what the characters in the story should do, and you flip to different pages based on your choice and get to see different outcomes. I basically want to create a web-based version of this, where users not only get to see different outcomes based on their choices, but also get to contribute their own branches and paths to the story.

Of course, with users able to generate content, you could potentially have dozens of possible paths out from any given chapter (or 'node' or 'snippet', as I call them). In order to combat the potentially overwhelming number of options available, I plan to implement a voting system, similar to the ones used by Reddit or StackOverflow (but without the complexity of decay, though I may add that in later if needed... not likely). Basically, all paths will be available to any user by request, if they want to read and vote on them; but by default, the user will only be shown the top four most popular paths.

That's all I can give you for now, not because I don't want to share more, but due to time restraints... gotta jet! I've cobbled together a first-pass functional requirements doc for this project, so if you want to learn more, it's public on my project's GitHub page. You can check out all the gory details here!

2016-07-31

My First "Real" Side Project

Greetings, old friend, and well met, new acquaintance! You have stumbled across my dev blog at a fortuitous moment in my career. You can think of this as a reboot in many ways.

And I promise, if you read (or skip to the bottom of) this characteristically long-winded post, you'll find that it does, matter of fact, have a purpose.

At the most shallow level, I'm rebooting my blog. The old posts, I'm leaving them up for posterity. Some seem to have helped people, and I'm glad for that, despite a level of quality I'm not, in retrospect, happy with. Oh, well, as they say; oh, well.

At a deeper dive, I'm finding that I have rebooted myself. What manner of melodrama is this? Part of my self-improvement effort being a closer attention to a need for conciseness, I'll describe it thusly: I recently finished my Master's in Comp Sci. I'm psyched about it, in spite of myself, it's been a very trying road. I also recently landed my first real full time job as a software developer, with a fantastic company that I plan to talk about later, pending a discussion with leadership on the propriety of divulging various levels of trade secrets. In short, during the respite I gave myself between graduation and the first day of work, I realized that a day without career development, in some form or another, be it software development, reading, practicing, ideating, etc, was a day that felt in some sense hollow.

Note to self: 'in short'? Who am I kidding? Concision will never feature in this blog. I'm just going to accept that that is 'okay,' and that this is a place not only for sharing knowledge, but also for free expression. So I'll try and just enjoy myself a little writing these up, and hopefully the flavor of my style will stick on the back of your throat in a not wholly unpleasant way.

I digress. Point is, in my spare time, I've come to feel some kind of learning toward a better career as a software developer is not only fulfilling and rewarding professionally (and hopefully financially), but also personally. I find that I enjoy writing software. I prefer fun software, such as a near-complete, but technically in-progress web tool that I started on, and which I shall shamelessly plug posthaste: How Many Drinks In That Drink? I put this little static web app together to help beer snobs track how much alcohol they're really drinking.

This was an incredibly rewarding project for me. Not only because the end result was useful to me personally as a craft beer fan. Not only because others will hopefully find it helpful, possibly in deeply meaningful ways. Not only because it is taking shape better than expected. But also more importantly because I learned a ton about a new software domain and new technologies in building it. This last point was, I have found in-spite-of-myself, probably the most rewarding part of building the tool and the part that has stuck with me the most.

To place this narrative in temporal context, How Many Drinks was made over winter break, basically January of 2016, so yeah, fair to say it's been a while since I worked on a side project; but the experience and the feeling it gave me stuck, and it's been gnawing at me ever since, however gently. Grad school resumed that spring term, delaying my ability to spend time on personal projects, then my month off between school and work was packed, I say packed with travel, and then I fell into this new job, and I fell hard.

Alright, now what manner of melodrama is this? Well, I won't name names because I haven't run the idea of connecting my employer to myself in this blog past my boss just yet; but I will say it's a software consultancy firm with a highly unusual, enthusiastic, and very genuine focus on growing talent internally, rather than burning it out and tossing it on the midden to make space for the next unfortunate soul. I won't get into too many details, but the basic idea is that they take care o' ya in a big way, protecting you from overwork, and making opportunities for you to grow both personally and professionally without taking your life away. Sounds too good to be true, right? Well, I'm not exaggerating in the least when I tell you with honest, genuinely unsarcastic, dead-straight, and seriously intense eye contact that I made it to the final level of on-site interviews at Google, and the interview at my current employer was equally challenging, yet more grueling. Rewards are earned, sometimes, I guess.

That felt a little tangential, but it has a point to it in the emphasis on career development without employee burnout. The basic policy is to keep client work to a sensible level, close to or even occasionally below 40 hours a week, to make space over the span of a reasonable work week schedule to spend on career development. Meaning, you get to work on building technical, business, networking, and other skills on the clock; and it's not only allowed, it's encouraged. I'm trying to think of a more melodramatically eloquent way to put this last, most salient point, but what it basically comes down to is that I'm absolutely psyched to fall into such an opportunity just at the same time I'm learning to really, truly love learning and career development in what I unfortunately have to refer to as a synergistic way. (I know, we all hate the word synergy because it has been so badly misused by middle management for so many years, but this particular synergy is both real, and startlingly pleasant.)

You will soon realize that all of the above has been an elaborate way of leading you to an announcement that I am starting a new project; not only a side project, but a project of passion. I will be blogging about it regularly, discussing what I've learned, what I've achieved, and any pitfalls I've encountered; I set this explicitly for myself as a task. I'll be posting weekly, as the plan has it, both to motivate myself to get work done on it more quickly and also to practice blogging more quickly, frequently, and effectively (and yes, even concisely ... starting next post, as always).

The project itself, which I'll describe in next week's post, is already under way, and it's quite exciting and fun to be making progress on it already (in a sense you may not agree with calling 'progress,' but we'll get to that). In any case, hope to have you along for the ride, and even if you don't care to read up on my trials and tribulations, I hope you'll enjoy the result when it's done!

Thanks for reading!
- Steven Kitzes

2015-03-26

Troubleshooting Serial Communications

After two months of troubleshooting, countless gallons of coffee, endless hours of stress, several years off my life, and many square inches of cranial real estate lost to newfound baldness, I finally solved a longstanding, serious blocking bug with a single line of code. I don't know how useful the particulars might be to anyone who stumbles across this posting, but the thought process and methods used to narrow in on a solution might help other fledgling developers by giving them new angles from which to view problems. In any case, I want to document the process for myself, because it has been a very painful ride, and one I'd very much like to think I've learned from.

By way of context, I'm working on enabling two-way communication over serial COM ports using the Windows API. One application, written in C++, needs to communicate with another, written in C#. Both applications existed before this new use case was devised, and both applications were previously proven to successfully communicate over COM ports. However, when the two applications were set up to communicate with each other, the communications failed 100% of the time. I had to figure out why.

It's worth mentioning here that prior to finding myself attached to this project, I'd never been exposed to many of the concepts and technologies involved. I have some limited experience with C++, for instance, but not in a large-scale production environment. I've never worked with serial communications before, and never used the Windows API for C++, which is not as friendly to newcomers as other libraries can sometimes be. Some complexities were also encountered in the realm of threading, which I have some experience with, but not in the Windows environment. A big part of the reason this solution took two months is that I had to learn all of these concepts in parallel in order to start focusing in on the location and nature of the problem.

The first thing I did was to have someone walk me through the existing functionality and where the breakdown was occurring. It was explained and demonstrated to me that the client application, written in C++, was able to send a message to the server application, written in C#. The server reported successful receipt and parsing of the message, and reported a consistent attempt to respond. After that, there would be silence from both applications. The client reported that it was listening for a response from the server, but no response would arrive - or at least, the client did not report receiving it.

So began my adventure. The first thing I did was to look at the client side application and implement some kind of logging functionality. The existing code, having been whipped up in an apparent panic on a tight deadline, provided no logging - in fact, no output of any kind was visible to the user, and no comments or documentation were given in the code to help those who would later have to maintain or extend the application.

It took me several days just to implement logging, and there are a couple of reasons for this. First, as mentioned above I had never worked with C++ before, and learning the ropes on that front is not trivial, especially where file access and streams are concerned. But the bigger stumbling block in this particular case was the unorthodox use of the standard output buffer.

The original author of the client side software had been intercepting all standard output and copying it to a secondary buffer, where it was stored and later passed over a named pipe for use as input to an integrated service. Since there was no documentation of this method of message passing, it took many long, confusing hours and lots of help from more experienced developers for me to come to the understanding that every time I tried to use console output for debugging purposes, it was breaking integrated services because they were not expecting my debug messages to come in over the pipe! So console logging was out, and I had to do any and all logging strictly to disk (or to debug output in Visual Studio, where execution in debug mode was permissible), where the log file could later be read and investigated. Whew...

In any case, I did manage to get a logging feature set up and then it was off to the debugging phase. I set up logging output to report on program status throughout the execution of the client side code, as well as setting breakpoints to investigate the state of suspicious variables. This yielded some curious information.

The first thing I tried was to check the ReadFile(...) command on the client for errors. It turned out that the call to ReadFile(...) was returning error code 0, with a timeout. In other words, no errors were being thrown. The ReadFile(...) call was successful, and all arguments passed to it were valid, but nothing was being received before the given timeout parameter was met. I tried setting the timeout to infinite, and this resulted in the ReadFile(...) command looping, as you might expect, infinitely.

Since no error was being thrown, I assumed that the port was open, and that the client had successfully connected to it. This suspicion was reinforced by the fact that expected data had been verified arriving at the server, as explained above. However, just as a sanity check, I set breakpoints to observe the definition and state of the file handle used by the Windows API to represent and access the COM port itself. I verified, in this way, that the serial port handle carried the same definition and state when listening for a server response, as it did when it was sending a message to the server. As far as the client application was concerned, it was a simple matter of no data coming in over the seemingly valid port.

More sanity checks came over the following weeks. I started building simplified sandbox applications with the dual-purpose of learning, so I would feel more comfortable with the Windows API and COM port communications in general, and also to verify that the code worked as expected, both on the C++ and the C# sides. I built a simple C++ program whose only mission in life was to contact the server with a hardcoded, known-good message, and listen for a (and report the receipt of) a known-good response. It worked! This was my first sigh of relief, but didn't yield any immediate solution.

Keeping my momentum up, I built a simulated server with the same strategy in mind, just to ensure that there wasn't some idiosyncrasy in the existing server code that made it behave oddly. As expected, the simplified, standalone sandbox server I whipped up worked. My sandbox C++ client was able to contact my sandbox C# server over the expected COM port; the C# server responded over the same port; and the C++ client received and reported the server's response. Everything worked! Unfortunately, also as expected, the simple sandbox server also behaved exactly the same as the real server when used in conjunction with the real C++ client.

I felt I was back at square one. I had tried lots of things, and verified little more than the simple fact that everything should have been working! All the C++ code I wrote worked, and all the C# code worked. The ReadFile(...) and WriteFile(...) calls and even the CreateFile(...) calls, and all parameters passed to these functions, were identical - as far as I could tell. I even went so far as to duplicate the code I was using in the sandbox to build the COM port in the production application. This still did not avail.

Then (this morning) something interesting happened. I had been going back and forth between testing my sandbox apps and their production counterparts, and I realized that after running my sandbox app successfully any number of times, any failed execution of the production client permanently broke the COM port, even for future attempts at running the supposedly known-good sandbox app! This didn't make much sense to me, but I also stumbled across the fact that running a C# version of the sandbox client seemed to repair the COM port. Something was so dramatically different between the COM port setup in the C++ and C# applications that not only did the C# application run more reliably, it actually repaired the damage done by the production client, that the sandbox C++ client wasn't able to address on its own.

I did a side-by-side comparison of the code in the C++ and C# applications to see how they set up the COM port (yes, even though I had written both). I saw that the examples I had followed in building the C++ application had only set a few of the DCB parameters during initialization of the COM port. (DCB is a struct in the Windows API that contains all the data needed to manage a COM port.) It only set up the parameters needed to establish a COM port connection under known good conditions. Since this had been working for me under most test conditions, and it hadn't even occurred to me that there were parameters that weren't being set one way or another, I didn't think to look there. And it turned out that yes, there were DCB parameters that I hadn't even known were going uninitialized, because most of the time I didn't need them.

The C# application, on the other hand, had been developed based on a more thorough set of tutorials and examples, and included full initialization of all DCB parameters; most importantly, the DTR (Data Terminal Ready) and the RTS (Request to Send) flags. Setting both of these explicitly to enabled or handshake mode, rather than the default disabled mode, suddenly fixed everything.

Now I felt a broad spectrum of mixed emotions. On the one hand, I was elated that a two-month troubleshooting session had finally, finally, finally come to an end. The problem was solved, and all would rejoice. On the other hand, it took me two months to solve the problem, and there was no rejoicing in that, especially given the simplicity of the fix, which was not even a one-liner. I only had to add a couple of arguments to an existing function call, it was that simple.

No one else on the project seems terribly upset with me, though. After all, each time I asked for help, more experienced developers did not see the solution either, or have a particular idea of where to focus the search. All of us went on many wild goose chases trying to pin this problem down, and it's a relief to have it behind us. Also on the bright side, though the wild goose chases did not, for the most part, yield anything beyond validation of pre-existing suppositions, they did teach me a lot about new ways to troubleshoot, debug, and test assumptions to ensure that you do know what you think you know.

Thanks for reading!
- Steven Kitzes
2015-02-22

Virtualizing Ubuntu with VirtualBox in Windows 8.1

After my homework was done tonight, I decided to have a little fun and experiment with virtual machines and their relationships with their hosts. More on my ultimate goal with this experiment later, but it may suffice to say that the necessary means to the end included running a virtual machine with some kind of visual GUI interface with remote desktop access. I chose Ubuntu for this task because it's a free Linux based OS that includes a simple GUI that I'm familiar with.

I had a harder time than expected getting this all set up, for a few reasons. For one, it wasn't easy finding a comprehensive guide on how to do much of this. I did eventually find a very handy guide to setting up the basic Ubuntu VM in Oracle's VirtualBox here. The guide is straightforward for beginners, but there were still sticking points for me that I want to go over.

The first few basic steps to pulling this off (as listed in the guide linked above) are to get VirtualBox, get a copy of Ubuntu in .iso format (32 bit versions are more reliable and easy to work with for this), and install Ubuntu into a new VM in VirtualBox using the .iso. This is, however, already a departure from my initial expectation.

In the past, I've been running VMs from TurnKeyLinux. The fully provisioned TKL system images I've been using came in the form of appliances, which are extremely handy. VirtualBox allows you to import an appliance in a single operation; you don't even really need to configure anything. It will just run the VM with all the software you wanted provisioned. I most recently downloaded a LAMP stack running on a Debian distro that comes out of the box so conveniently pre-configured that you can access phpMyAdmin on the VM from your host in about five minutes from the time you initiate the appliance download. It's really that easy. But I digress.

In my folly, I assumed an appliance would exist for a simple, clean installation of Ubuntu. What I found instead were dead links, shady sources that I didn't fully trust, and an appliance I tried to install that did run, but would hang on any login attempted. It took me a while before I realized, thanks to the tutorial linked above, that there was another way; that being the .iso installation.

So I did that. Lo and behold, using the handy dandy tutorial, I had Linux running in a VM inside ten minutes. But it looked horrible. Absolutely horrible. The resolution was capped at 640x480, and all the window contents were so badly cut off that the GUI was literally unusable.

This was the best I could get after my initial installation.


To make a long story just-a-little-less-long, an Ubuntu VM needs to have its device drivers and system applications installed after the OS is installed into the VM. This is done via the installation, in the case of VirtualBox, of the VirtualBox Guest Additions. But even armed with this knowledge, it's not easy figuring out how to get the blasted things into your VM.

I found some threads suggesting all kinds of terminal commands, sudo apt-get install blah-de-blah-de-blah. It might be due to my version of Ubuntu or for other reasons (I never really figured it out), but none this of this worked for me. I got errors about missing dependencies; I tried to manually install these, only to find absent dependencies chaining together; several steps along that chain I came to a place where a vague message about existing packages preventing dependency installation prompted me to flip tables and head in search of another solution.

Turns out that the Guest Additions themselves are contained on yet another .iso. I went through another minor crisis trying to source and install the appropriate .iso file all from within the still-ailing VM itself, because that's where it needs to be installed. To my chagrin, it turns out the Guest Additions .iso is already there once you get Ubuntu running in a VirtualBox VM. You just spool up your Ubuntu VM, then in the VM view window you visit the Devices menu and select Insert Guest Additions CD image.... Wow. Well. That was easy, eh?

Now, for the long-ago promised revelation of my ultimate goal in all of this. Earlier tonight I dropped a line on Facebook about how I could see it being easy to get lost when you have multiple VM and remote desktop views open on the same machine. A friend and I went back and forth about it until I joked about remoting into the host machine from its own guest VM. The glorious result took a couple of hours to achieve, but the laughs and learning were worth it.

Ridiculous.


A night well spent.

Thanks for reading!!
- Steven Kitzes

2015-02-13

A Brief Study of the Independent Set Problem

Prologue

I normally prefer to share posts of a more practical nature, but in celebration of a hard-fought semester fraught with theory, research, and not a whole lot of actual development in the curriculum, I've decided to share some of what I learned even if it isn't directly applicable to the kind of day-to-day development most of us face on the job.

One of my most vicious classes last semester was combinatorial algorithms, a course focusing on algorithm design and analysis with particular attention to time complexity. Needless to say, computers and programming didn't factor into the curriculum at all. This was strictly a math class. Our big assignment for the semester was to pick an existing problem in the math domain, describe it in detail, and analyze a variety of the known approaches to solving it.

I chose the independent set family of problems, and the professor - considered one of the most brutal on campus - wrote me to congratulate me on a flawless paper. So I figured it must not have been too shabby, and I'll pass it on to the masses! Now, let's talk about independent sets!

Introduction: What is an Independent Set?

If you already know about graphs, and what an independent set is, you can skip ahead, but a little bit of background knowledge is needed to understand what an independent set is. Fair warning, it would be quite helpful to know a little bit about graphs, time complexity, and dynamic programming (or at least recursion). But I'll do my best to make this digestible with a minimum of prerequisite knowledge.

The very least you need to know is that a graph is made of vertices and edges, so that the edges connect the vertices together, like connect-the-dots. You can have a graph with any number of vertices, connected to each other in any number of ways by any number of edges. We call the group of vertices together a set of vertices, and the group of edges is also a set. Any group of items that belongs to a set (but might not include all of the items in that set) is called a subset.

So, if we have a graph, let's call it G, composed of vertex set V and edge set E, an independent set within that graph is a subset of the vertices in G where none of the vertices in the subset are connected by any edge. In other words, an independent set of vertices in a graph is a subset of the graph's vertices with no two vertices adjacent.

Two important types of independent set we will talk about below include the maximal independent set and the maximum independent set (they are sometimes, but not always, different from each other). We will also discuss what a graph’s independence number is. For the most part, we're only concerned with maximum independent sets and independence numbers, but I want to talk about maximal independent sets because that will help us to understand just what a maximum independent set is.

A maximal independent set in G is a type of independent set. In a maximal independent set, if you add any vertex from the total vertex set V, that wasn't already in the subset, that would force an adjacency into the subset. Remember, if we have two adjacent nodes in our graph, it's not independent. So a maximal independent set is a subset of the vertices in G that can't have any more of G's vertices added without stopping the subset from being independent.

There are two things I find worth noting about maximal independent sets. First, a given graph might have any number of maximal independent sets. Second, each maximal independent set might have a different total cardinality (number of vertices in the subset). In other words, a single graph might contain multiple maximal independent sets, each of varying size. The largest possible one of these is called the maximum independent set. This is the largest independent set found in a given G.

Note also that a graph can have multiple maximum independent sets, but in this case, all of the maximum independent sets will have the same cardinality.

Finally, whether there is only one maximum independent set, or there are many, we refer to the cardinality of maximum independent sets as the independence number of the graph to which they belong.

We'll use these terms and concepts more below to discuss a variety of problems relating to independent sets, most importantly to my research, the maximum independent set problem and the independent set decision problem

Details: Problem Formulation and Motivation

As we noted above, the maximum independent set problem takes a graph as input, G = (V, E). The goal is to find a subset of V comprising one maximum independent set on G, which might just be one of several maximum independent sets in G. The solution can then be used to obtain the answer to the independence number problem, which takes the same input (a graph) but seeks, instead of a maximum independent set, the independence number of the graph (the number of vertices in the maximum independent set). All we have to do to get the independence number once we have the maximum independent set is return the cardinality of the maximum independent set, and we're done. Along the same lines, the solution to the maximum independent set problem also comes packaged with the solution to the independent set decision problem, which is looking for a simple Boolean value: true if the graph’s independence number is greater than or equal to some given number, k, and false otherwise.

In other words, we can formally define the independent set decision problem as taking a graph, G = (V, E) and an integer k, and returning a Boolean value, true if k is less than or equal to G’s independence number, or false if k is greater than that independence number. In the simplest terms, we have a number, and we want to know if there is an independent set in some graph that is as big as our number.

Input: a graph G = (V, E), and an integer k Output: a Boolean true or false value

Believe it or not, these versions of the same problem – maximum independent set, independence number problem, and independent set decision – each has a specific real world application. The maximum independent set and independence number problems in particular have a wide variety of practical uses. The maximum independent set, for instance, is a problem that materializes in visual pattern recognition, molecular biology, and certain scheduling applications; and the independence number problem has applications in molecular stability prediction and network configuration optimization.

Astute readers will notice that I've omitted the very specific subject of the independent set decision problem, which (to refresh our memories) seeks only a Boolean value and no other data. This member of the independent set family of problems is not considered to have any practical "real world" application. That said, it plays a crucial role in the realm of theoretical research. It is considered necessary in order to apply the theory of NP-completeness to problems related to independent sets. That's a topic for a whole other kind of blog post.

Though the topic of NP-Completeness can get pretty hairy, the dominating factor of the time complexity of solving the decision version of this problem is the same as for the independence number problem or the maximum independent set problem. As mentioned above, the decision version of the problem uses the same underlying algorithm as the independence number problem, and simply examines the resulting data to a different end. In short, to get the solution to the decision problem, we reduce the independence number solution to a Boolean value. The independence number problem itself is the same as the maximum independent set problem, with the output reduced to a single value representing the cardinality of a maximum independent set in G. But we're getting a bit beside the point here.

Since the domains of practical applications defer in large part to the maximum independent set and independence number versions of this problem, this is where the vast majority of interesting research on the topic of independent sets has been done. The complexity of the algorithms to solve all three problems is dominated overwhelmingly by the operations performed in the original maximum independent set problem. The transformations we have to make to produce solutions to the other versions of the problem are pretty trivial (counting cardinality, or comparing a given k value to the independence number to determine a Boolean value). For that reason, we'll focus on the research surrounding the maximum independent set problem.

The Brute Force Approach – Slow but Simple

Now let's talk about how we actually solve this problem. The brute force approach to the maximum independent set problem is very simple in principle. In short, all we need to do is iterate over all possible subsets in G, and then for each subset, check all vertices v in V for pair-wise adjacency. The time complexity of checking each possible subset is O(2n), yielding an exponential time complexity, and the checking of all vertices yields an additional (relatively insignificant) polynomial factor to the complexity, referred to in this case as poly(n), where n is, of course, the number of vertices in G. We consider the polynomial factor insignificant because the complexity of any polynomial factor will never dominate the exponential factor of O(2n), and so becomes irrelevant for large graphs.

In summary, for each vertex subset S in V, we check all vertices in S for adjacencies. If an adjacency exists, this subset can be thrown out because the adjacency violates the defintion of an independent set. As we iterate over subsets, we simply measure each and track which is the largest. For maximum independent set, we return the independent set that ends up providing the largest number of vertices over all iterations (this being the largest, read maximum independent set). This ends up taking a total of O(2npoly(n)) time. For the independence number problem, instead of returning the largest independent set, we return only the cardinality of the largest independent set, which we can trivially store while iterating over subsets. Finally, in the case of the independent set decision problem, we simply compare the independence number gained via the above brute force algorithm, trivially compare it against our given k, and return the appropriate Boolean value, yielding a worst case that is still O(2npoly(n)) time.

Serious Business: Strategy and Analysis of an Improved Algorithm

Before we get too excited, it's only fair to say right up front that we are not going to beat exponential time complexity with any known algorithm for solving this problem. That said, a fair amount of research has been done on it, yielding impressive improvements to the base of exponentiation. This, in turn has led to vastly improved run times in real world applications that rely on solutions to the independent set family of problems. (We're going to start getting very technical here.)

Following Jeff Erickson’s guide to the optimization of the independence number algorithm, we see that there are a series of steps that can be taken in turn to improve the performance of our algorithm. As a first step toward understanding the complicated means of optimization, Erickson provides a recursive formulation of an algorithm for obtaining the independence number on a graph, G (shown below). Next, he shows that the worst case scenario for that recursive algorithm can be split into subcases, some of which are redundant recursive calls that do not need to be performed in duplicity. Eliminating these duplicate cases, obviously, improves run time complexity. Finally, he shows that this improvement can be repeated on the resultant worst case, splitting that into further subcases, some of which are also redundant; and so on and so forth, continually improving the run time complexity in seemingly small, but ultimately meaningful, increments. To begin, observe Erickson’s most elementary version of the algorithm in its recursive form:

MaximumIndSetSize(G):
if G = { empty set }
return 0
else
v = any node in G
withv = 1 + MaximumIndSetSize( G \ N(v) )
withoutv = MaximumIndSetSize( G \ {v} )
return max { withv, withoutv }

To clarify the notation here, N(v) refers to the neighborhood of v, meaning the set that includes v and all of its adjacent neighbors, but no other vertices. The backslash symbol refers to set-wise exclusion or "subtraction." For example:
{ a, b, c } \ { b } yields { a, c }.

As you can see at a glance, the number of recursive calls at each iteration is doubled! This yields the same exponential growth of time complexity we saw in the brute force approach. What’s worse, we see that in the worst case, G \ N(v) = G \ {v}, meaning that v has no neighbors! This means that in both recursive calls at each iteration, our vertex subset is only being reduced by size 1. The result is the recurrence equation T(n) = 2T(n – 1) + poly(n), yielding a time complexity of O(2npoly(n)). T(x) here represents the time required to solve a problem of size x.

At this stage, though no clear improvement has yet been made, we already have the information we need to make our first improvement to the algorithm. As noted above, in the worst case, G \ N(v) = G \ {v}, meaning that v has no neighbors. However, if v has no neighbors, then it is guaranteed to be included in every maximal independent set, including maximum independent sets, because a node that never has neighbors is always independent! As a result, one of the recursive calls, the one assigning the value withoutv, becomes superfluous, because no maximum independent set can exclude v if it never has neighbors in any subset. At the same time (but on the other hand), if v does have at least one neighbor, then G \ N(v) will have at most (n – 2) vertices. That's quite a brain-full, so let me explain it another way, with concrete examples.

Let's say G has 10 nodes total. So n is 10. Then, if our random node v has at least 1 neighbor, then the neighborhood of v is size 2 or greater. Since N(v) is 2 or greater, then G \ N(v) is 10, minus some number 2 or greater. This line of reasoning yields a new recursive formula with a dramatically improved run time complexity:

T(n) ≤ O(poly(n)) + max{T(n - 1), [T(n - 1) + T(n - 2)]}

The run time complexity on this improved version of the recursive algorithm is reduced to T(n) ≤ O(1.61803398875n) after just one subcase division! That might not seem like much of an improvement, but in a little bit we're going to see some concrete examples of just how big an improvement this can make at execution time. In the meantime, following this line of logic and making further observations, we can immediately improve on our new worst case by splitting that into subcases – some of which are, again, redundant and superfluous.

Note that our new worst case is the case in which both T(n – 1) and T(n – 2) must be calculated. In other words, this is the case in which our recursive calls are doubled, and in which the graphs we pass along are of relatively large size (only 1 or 2 vertices smaller than the graph from which they were derived). In this specific case, v has exactly 1 neighbor; let's call this neighbor w. Specifically because v has exactly 1 neighbor, we will find that either v or w will appear in every maximal independent subset of our original G. Think about it: if w is in a maximal independent set, v simply can't be, because they're neighbors, and two neighbors can't both be in the same independent set. Conversely, if w is not in a maximal independent set, v will be, because its only neighbor is not in the set, which frees v up to join without fear of standing by an adjacent neighbor. Taking this line of reasoning yet another step further, we see that given a maximal independent set containing w, we can remove w and instead include v. Therefore, we can conclude that some maximal independent set will include vertex v (whether this maximal independent set ends up being maximum or not).

Note also that if we know there is a strict pair-wise relationship between v and w (due to the given fact that v has 1 adjacent neighbor), we never have to evaluate the recursive case in which the call MaximumIndSetSize(G \ {v}) needs to be made. Our case evaluating T(n – 1) + T(n – 2) becomes only T(n – 2). Furthermore, expanding on our idea from the last worst-case scenario subcase split, we will see that if the degree of v is 2 or more, then N(v) will contain at least 3 vertices, and therefore G \ N(v) will have at most (n – 3) vertices. In such a case, the max{...} function of our recursive algorithm is expanded:

T(n) ≤ O(poly(n)) + max{
T(n - 1),
T(n - 2),
T(n - 1) + T(n - 3)
}

This second improvement yields a time complexity of T(n) ≤ O(1.46557123188n), a smaller but still valuable improvement. On the other hand, note that the complexity of the algorithm is growing rapidly here. Not the time complexity, but the algorithmic complexity, as well as the difficulty we find in determining where to make future optimizations. At each step we take toward a faster algorithm, things are getting much more complicated. At this point, the complexity of the algorithm and the steps required to make further improvements go beyond the scope of what I can talk about in a blog post (even one as ridiculously long and complicated as this). However, Erickson does go on to show that further clever observations can be made continuously, yielding even better time complexities. Two further observations of worst-case splitting and problem structure yield time complexities T(n) ≤ O(1.44224957031n) and T(n) ≤ O(1.3802775691n), respectively. According to Erickson, the best published time complexities for this problem are solutions quoted by Fomin, who achieved T(n) ≤ O(1.2210n, and Bourgeois, who managed to achieve an impressive T(n) ≤ O(1.2125n).

Considering we're still ultimately stuck with exponential time, it may seem like a lot of work needs to be done for miniscule returns. After all, 1.221 and 1.2125 are almost the same number, right? On the other hand, certain practical applications demand tremendous effort, and therefore any ounce of efficiency that an improved algorithm can provide becomes valuable. Larson includes as an example in his writings a reference to the prediction of molecular stability in the tetrahedral C100 isomer. For this example, the time complexity T(n) of determining the independence number of this molecule is T(100). Therefore, working out the arithmetic, we see the run time for this example reduced as follows (ignoring poly(n):

Algorithm Time Complexity ≈ Run Time
Brute Force O(2100) ≈ 1.26765e30
Best method described by Erickson O(1.3802775691100) ≈ 9.923e13
Fomin et al O(1.221100) ≈ 4.69425e8
State-of-the-art described by Robson O(1.1889100) ≈ 3.26989e7

With these concrete numbers to reference, we can see clearly that the jump from the brute force method to even a slightly optimized solution is more than worth the effort. The first jump alone results in an improvement to run time of many orders of magnitude! After that, we admittedly begin to see diminishing returns for the effort taken to develop improved algorithms. For instance, I personally doubt that the extra effort by Bourgeois to beat Fomin by a mere 0.0085 on the exponentiation base was of debatable value as anything more than a stepping stone. In my personal opinion, the return on invested effort put in to develop Robson’s final state-of-the-art solution (discussed below) was not worth it for such a small gain from Fomin's algorithm. At least, not in the case of the C100 stability prediction problem. That said, 100 may be considered a small quantity of vertices in some problem domains, such as large network configuration optimization or scheduling problems. In those cases, it may actually be worth it to go to the trouble of researching and developing the absolute best state-of-the-art in terms of fast, efficient algorithms.

Robson's Incredible State of the Art, Conclusions

Research has yielded relatively fast algorithms for solving the independent set family of problems. Some, notably by Bourgeois, are capable of a time complexity as low as a flabbergasting T(n) ≤ O(1.0854n) time complexity using strategies of case analysis and reduction rules. However, it's worth noting that algorithms that are as fast as these come with severe limitations. For example, the Bourgeois algorithm is limited to graphs with average vertex degree 3. That is a serious limitation! The fastest published algorithm for solving the independent set family of problems for generic graphs (with unbounded number of degrees), by Bourgeois, runs in only T(n) ≤ O(1.2125n).

The absolute state of the art for solving the independent set family of problems is actually a computer-generated algorithm. The algorithm is described in an unpublished technical report by Robson, and is claimed to boast a time complexity of only O(1.1889n). However, the trade-off at this level of acceleration is mind-boggling algorithmic complexity. Just the high level description of the algorithm, excluding the rest of the accompanying report, fills fully 15 pages, and thus excludes discussion of the algorithm in any depth from the scope of most academic papers, let along blogs. I'm not an expect on algorithmic analysis at quite that level, but I'd wager such an algorithm would even be excluded from use in applications at that point, due to its sheer complexity.

As algorithms grow in efficiency, but also in complexity, it gets tough to make universal recommendations on which to use – or, in the case of the algorithms described above, how deep through the iterations of optimization a project team should go to try and improve the performance of their algorithm. The context of the project would have to come into factor.

For projects dealing with small graphs, it wouldn't be worth the effort to interpret and implement something like Robson's solution. Something like the example described by Erickson and outlined above would probably be good enough. For projects dealing with graphs of moderate size and predictably small average vertex degrees throughout, but needing accelerated solutions, something like the algorithm developed by Bourgeois would provide a superior middle ground.

Thanks for reading!
- Steven Kitzes